ARE YOU READY FOR 3D Nail Art Guide For Beginners
ARE YOU READY FOR 3D Nail Art Guide For Beginners

Some women have a fetish for shoes and some for clothes, but there are many others ready to spend any amount on decorating their nails. If you’re one of them, we have something that could be of use to you. It is a how-to guide on 3D nail art.
Earlier, a nail routine was confined to trimming, filing and painting fingernails. Bright red and blush pink shades became classic colors in the nail polish category. In the later decades, women experimented with darker hues. It didn’t stop there. A plain coat of polish looked too simple and basic. As a result, nail art came to be used. Solid colored surfaces were decorated with dainty designs. The evolution continued and the latest is 3D nail art.
3D Art – A Brush-up on the Basics
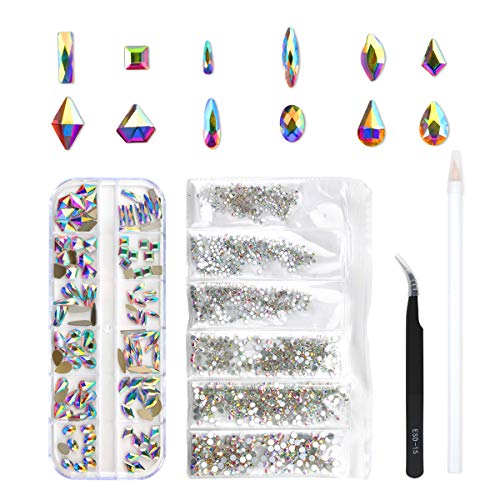
Although the name 3D seems to suggest a hint of technology, this ornamentation technique steers clear of science. 3D nail art is also known as Japanese Nail art because it originated there. This technique uses three dimensional designs and motifs. This includes the use of molded acrylics, tiny charms, trinkets, small gems and rhinestones.
3D nail art is challenging given the limited space you have to work within. If you are new to it, it will take time to get used to the application methods. Therefore, it is best to start with acrylic nails instead of natural fingernails. The separate surface allows for a steadier hand and a neater finish. The acrylic units can then be applied to your natural fingers. Acrylic nails are stronger and also offer more room to work with. Once you get used to the process and develop confidence, you can start working with your natural nails.
There are a number of factors to consider when choosing 3D nail art designs. Unlike regular nail art which creates for a flatter surface, 3D designs are raised in appearance. One should consider how much they use their hands at work and around the house when selecting a pattern or motif. If you use your hands a lot, for instance you are required to do plenty of typing at work, avoid choosing elevated designs. Raised designs have a higher tendency to break and chip. Choose a design that will endure daily activities. However, if you’re having your nails done for your wedding day, you can choose intricate designs.
Consider the size and width of your nails. The amount of available space will decide the best design for you. Some designs like characters need a broad surface while a simple spray of flowers will easily accommodate on a narrow surface.
3D Nail Art Designs
There is a range of designs to choose from. We have mentioned a few below.
Flowers are one of the most popular designs. They are neat and feminine. Floral designs include acrylic roses or floral designs painted with paint and decorated with crystals and stones. Akin to French manicure is the lace design. It features black and white lines with rhinestone accents. One can create a bejeweled look with crystal and rhinestone accents. Cartoon characters are also listed among popular 3D nail art designs.
Your choice in embellishments reveals a lot about your personality. You can also choose designs to match upcoming occasions and festivities.
How to apply 3D nail art?
The procedure is easy. Follow these steps to ensure you get it right.
- Keep all the supplies close at hand. You will require adhesive, polish (whichever you intend to use) and the desired decorations. Readymade ornamentation is easy to work with. If you will create your own, prepare it in advance. Pour the colored acrylic into the moulds and allow it to dry. After it has dried, remove it from the mould and set aside.
- Clean your nails. Remove stains of past polish coats.
- The base can be colored or nude. Decorations stand out better on a nude background. Paint a clear base coat. Allow it to dry. Paint a thin coat of glitter over it. A lot of women prefer to apply a coat of glitter to only the top-half of the nail while a few use a darker and lighter shade to distinguish the two halves. Let it dry properly.
- Dab a small amount of clear adhesive on the back of the crystal or acrylic rose and neatly paste it onto your nail. Avoid using too much adhesive as it tends to get messy.
5.Finish it off with a topcoat of clear nail polish including the 3D elements. The top coat will add a sparkle and protect the delicate elements from damage.
Where to buy the required supplies?
Professional salons offer 3D nail art treatments as one of their services. However, given the difficulty level of the task it is priced on the higher side. It is more expensive than a regular manicure or pedicure. For this reason, many choose to try the process at home. It is easy to do provided you have the right supplies.
Colored acrylics, acrylic moulds, glue, fake nails (optional), readymade embellishments, clear polish are some of the supplies you will need. These items are readily available at a cosmetic store or any other store that sells makeup items. Many brands manufacture three-dimensional nail elements so there is greater variety when it comes to price too. When purchasing supplies, you must consider the quality of the product in addition to the price tag. Low-grade products can cause potential damage to your nails. Several online stores specialize in art supplies; you can purchase these items online.
If you need a little guidance on how to get started, you can always surf the web. There several are nail art lessons available online. Many users also upload self-created videos with step-by-step instructions on how to apply 3D nail art.
Those of you that admire bejeweled fingernails but don’t have the time to create it can opt for pre-designed nails. Designers sell pre-designed nails to customers. They can also be custom-made. Customers can choose a design and ask a designer to create it on acrylic units.
3D nail art is pretty and attractive. Try it for a difference and add oomph to your nails!
-
100 Pcs 3D Halloween Nail Charms Accessories Punk Vintage Cross Nail Charm Mini Cross Series DIY Craft Nail Designs Supplies Nail Jewelry Making for Women Girls Finger Toe Nails, 5 Styles (Gold)
$6.99Original price was: $6.99.$4.99Current price is: $4.99. -
100 Pcs 3D Nail Charms for Acrylic Nails, FIVOINS Metal Punk Nail Charm Accessories Vintage Nail Art Supplies for Manicure Nail Art Craft DIY Nail Decorations (Retro Silver)
$9.99Original price was: $9.99.$7.77Current price is: $7.77. -
100Pcs 3D Butterfly Nail Charms Mix Color Variety Assorted Butterfly Nail Art Charms Cute Butterfly Nail Charms for Manicure DIY Crafts Accessories Jewel
$6.99Original price was: $6.99.$5.99Current price is: $5.99. -
12 Grids Halloween Nail Art Glitter Sequins Charm Decals Decorate,3D Halloween Theme Holographic Glitter Broom Witch Ghost Spider Cat Skeleton Pumpkin Hholiday Design DIY for Women Nails Supplies
$5.99Original price was: $5.99.$5.20Current price is: $5.20. -
120 Pieces Fake Nails, Acrylic Nail Kit Including 12 Different Size False Nails, Pink White French Nail Tips with Nail Glue and 3D Nail Art (Colorful)
$9.99Original price was: $9.99.$8.99Current price is: $8.99. -
150 Pieces 3D Nail Charms Heart Drop Nail Rhinestones Mix Sizes Nail Rhinestones AB Iridescent Nail Gems and Charms Gold Alloy Nail Studs Crystal for Women Girls Nail Decorations DIY Manicure
$15.99Original price was: $15.99.$14.99Current price is: $14.99. -
18 Sheets Star Nail Art Stickers Star 3D Self-Adhesive Nail Art Decals Holographic Laser Star Nail Art Supplies for Women DIY Nail Art Decoration Design Manicure Tips
$7.99Original price was: $7.99.$6.99Current price is: $6.99. -
2 Boxes 3D Flower Butterfly Nail Art Charms Acrylic Colorful Spring Blossom Flowers Butterfly Bowknots Nail Charms with Silver Golden Metal Beads for Nail Art DIY Crafts Jewelry Accessories
$8.99Original price was: $8.99.$7.99Current price is: $7.99. -
2 Boxes 3D Flower Nail Charms, Acrylic Flower Nail Art Rhinestones Mixed Cherry Blossom Nail Supplies with Pearls DIY Manicure Nail Decorations
$6.98Original price was: $6.98.$4.98Current price is: $4.98. -
2 Boxes Blue AB Flatback Half Round Pearls for Crafts ABS Multi-Sized Flatback Blue AB Nail Pearls Beads for Makeup Nail Face Art DIY Crafts Jewelry Phone Shoes Clothes Scrapbook
$8.99Original price was: $8.99.$5.99Current price is: $5.99. -
2 Set Acrylic Nail Practice Stands Magnetic Nail Tips Holders Training Fingernail Display Stands DIY Nail Crystal Holders and 96 Pieces White Reusable Adhesive Putty (Black and White)
$8.29Original price was: $8.29.$6.99Current price is: $6.99. -
2000 Pcs 3D Butterfly Acrylic Nail Charms Sets Rhinestones Butterfly for Nails Butterfly Nail Glitter Charms for DIY Nails Decoration Design Craft Accessories Women Girls (Flower)
$5.99Original price was: $5.99.$5.09Current price is: $5.09. -
2000Pcs Emerald Green Nail Pearls Rhinestones Crystals Half Round Pearl Beads Flatback Multi Sizes Green Crystals Gems Stones for Makeup Nail Manicure DIY Crafts Jewelry Accessories
$6.99Original price was: $6.99.$5.99Current price is: $5.99. -
200Pcs Camellia Rose Flower 3D Assorted Nail Charms Mixed Color Variety Camellia Flower Cute Nail Art Charms for Manicure DIY Crafts Accessories Jewelry
$7.99Original price was: $7.99.$6.99Current price is: $6.99. -
24 Boxes Nail Art Slices, FANDAMEI 3D Fruit Flowers Star Heart Shapes Nail Slices for Nail Art DIY, Craft, Decoration. Cute Design Nail Art Slice Fruit
$9.99Original price was: $9.99.$7.99Current price is: $7.99.


